MP Backend Integration
The desktop application can sync schedules to the Masterplan Optimiser web server so that organisers can view the calendar on their phones. This guide explains how to pair the desktop app with a running server instance.
Before you begin
- The desktop application must be installed and running (see Desktop Installation).
- A server instance must be deployed and accessible over HTTPS (see Server Installation).
- You need the server URL (e.g.
https://mp-opt.net) and a publish secret from the server administrator.
How It Works
The desktop application builds and optimises the schedule locally. When you are happy with the result, you publish the data to the remote server. The server then serves the schedule to organisers who access it through their browser or installed PWA.
Each publish pushes the current event's persons, tasks, schedule, and theme to the server - replacing any previously published data for that event. The publish secret authenticates the desktop app so that only authorised users can push updates.
Electron + FastAPI
Caddy + FastAPI + PostgreSQL
PWA Calendar
Data flows from the desktop application to the server and then to organisers' phones.
Step 1 - Obtain the Server URL and Publish Secret
Your server administrator (typically an NC Board Member or coordinator) will provide you with two pieces of information:
| Value | Example | Purpose |
|---|---|---|
| Server URL | https://mp-opt.net | The base URL of the deployed Masterplan Optimiser server |
| Publish Secret | abc123... | A secret token that authenticates this desktop app to push data to a specific event on the server |
The publish secret is created on the server's admin panel when the administrator sets up the event. Each event has its own secret.
Step 2 - Configure the Connection in the Desktop App
- Open the desktop application and select the event you want to publish.
- Navigate to Settings (gear icon in the sidebar).
- Find the MP-Backend Server section.
- Enter the Server URL (e.g.
https://mp-opt.net). - Enter the Publish Secret provided by the server administrator.
- Click Save.

Step 3 - Test the Connection
- After saving, click the Test Connection button.
- If the connection is successful, you will see a green confirmation message with the event name from the server (e.g. Connected to “Berlin International Session 2026”).
- If the test fails, check:
- Server unreachable - verify the URL is correct and the server is running
- Authentication failed - verify the publish secret matches what the server administrator provided
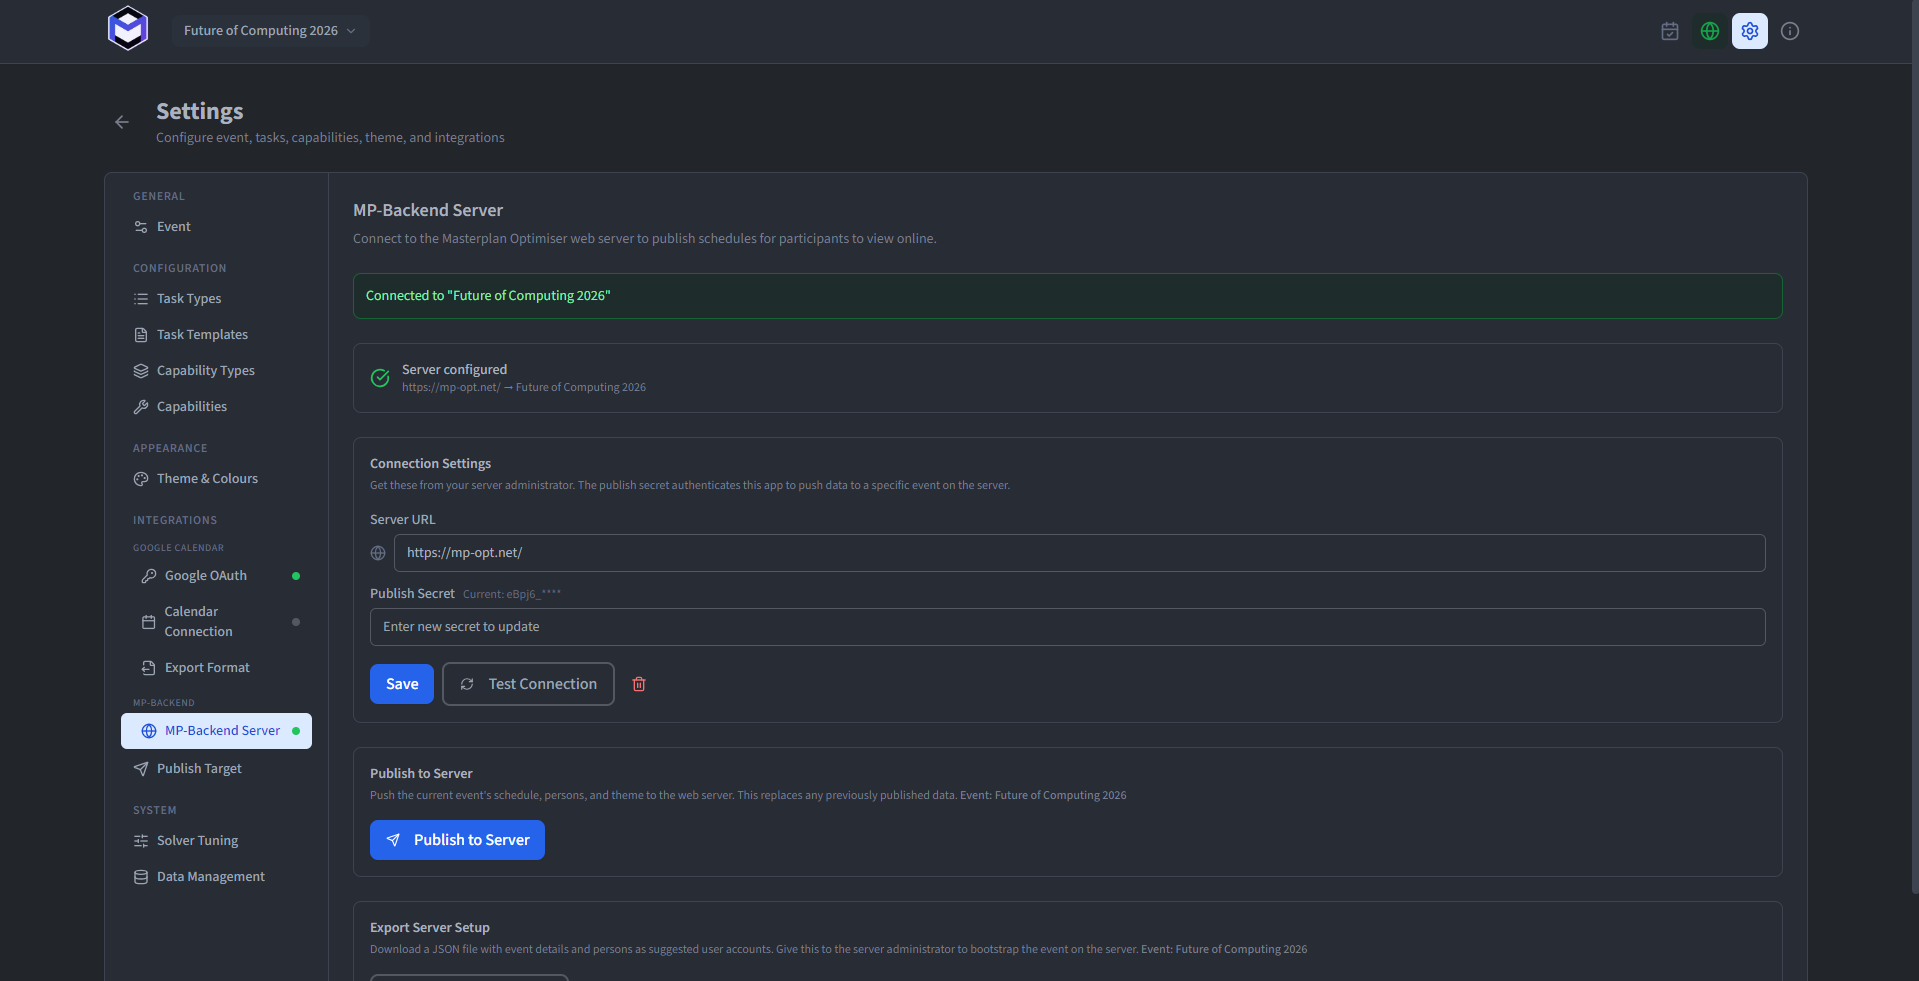
Step 4 - Publish the Schedule
- Make sure your schedule is finalised (see Finalising the Schedule).
- In the MP-Backend Server section, click Publish to Server.
- The application pushes the full schedule, person list, and theme to the server. A confirmation message will show how many tasks and persons were synced.
- Organisers can now view the schedule on the web calendar.
Exporting a Setup File
If you need to transfer the event configuration to the server administrator (or import it on another machine), you can export a setup file:
- In the MP-Backend Server section, click Export Setup.
- A JSON file is downloaded containing the event metadata, persons, and schedule data.
- Share this file with the server administrator for import.
Re-publishing After Changes
Whenever you update the schedule (e.g. after re-running the optimiser or making manual adjustments), simply click Publish to Server again. The new data replaces the previous version entirely. Organisers will see the updated schedule the next time they refresh or open the web calendar.
Next Steps
- Google Calendar Integration - publish events directly to Google Calendar
- PWA Installation - install the web calendar as an app on organisers' phones
- Web Calendar Overview - learn about the web calendar features