Google Calendar Integration
The desktop application can publish finalised schedules directly to Google Calendar, so every organiser sees tasks appear in their own calendar app. This guide walks you through creating the OAuth credentials and connecting them inside the application.
How it works
The application uses OAuth 2.0 to connect to a Google account. Once connected, you choose which calendar to write to. When you publish, every task for the selected day(s) is created as a calendar event - complete with title, location, attendees, and colour coding.
Step 1 - Create a Google Cloud Project
- Go to the Google Cloud Console.
- Click the project drop-down at the top of the page and select New Project.
- Enter a name (e.g.
Masterplan Optimiser) and click Create. - Make sure the new project is selected in the project drop-down before continuing.
Step 2 - Enable the Google Calendar API
- In the Cloud Console, navigate to APIs & Services → Library.
- Search for Google Calendar API.
- Click on it and press Enable.
Step 3 - Configure the OAuth Consent Screen
- Go to APIs & Services → OAuth consent screen.
- Choose a user type and click Create. See the comparison below.
Internal vs External User Type
Internal
Only available if your organisation uses Google Workspace.
- No Google verification required - works immediately.
- All email addresses within your organisation can authorise without being added as test users.
- The "Test users" step can be skipped entirely.
- No unverified-app warning screen shown to users.
External
Use this if you do not have Google Workspace (e.g. personal Gmail accounts).
- While in Testing mode, only accounts explicitly added as test users can authorise.
- Users see an "unverified app" warning and must click Advanced → Go to app.
- For production use, you can submit for Google verification to remove the warning (optional for personal use).
- Fill in the required fields:
- App name - e.g.
Masterplan Optimiser - User support email - your email address
- Developer contact information - your email address
- App name - e.g.
- On the Scopes step, click Add or Remove Scopes and add:
https://www.googleapis.com/auth/calendarhttps://www.googleapis.com/auth/calendar.events
- On the Test users step, add the Google accounts that will use this integration. While the app is in testing mode, only these accounts can authorise.
- Click Save and Continue through the remaining steps.
Step 4 - Create OAuth Client Credentials
- Go to APIs & Services → Credentials.
- Click Create Credentials → OAuth client ID.
- For Application type, select Desktop app.
- Give it a name (e.g.
Masterplan Desktop) and click Create. - A dialogue will show your Client ID and Client Secret. Copy both values - you will need them in the next step.
Step 5 - Enter Credentials in the Application
There are two ways to provide the credentials:
Option A - Via the Settings page (recommended)
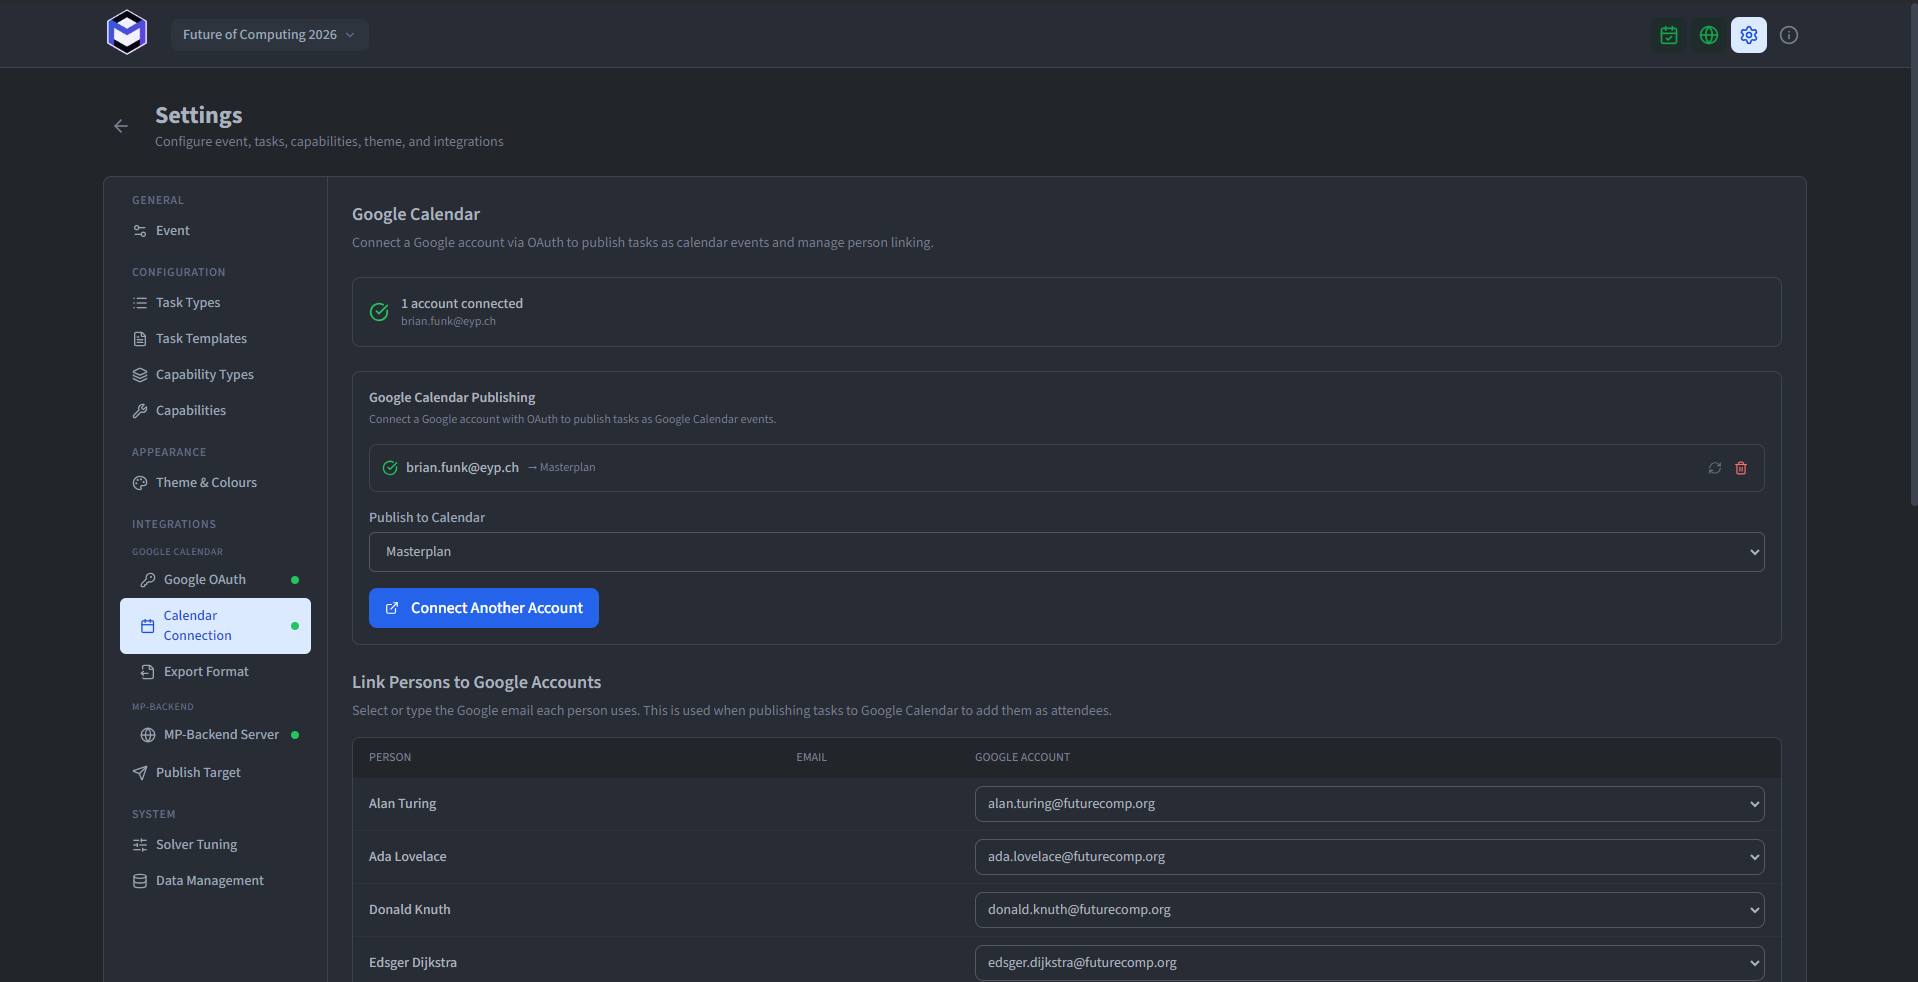
- Open the desktop application and navigate to Settings → Google Calendar.
- Paste the Client ID and Client Secret into the corresponding fields.
- Click Save. The credentials are stored locally in the application database.
Option B - Via environment variables
If you are running from source, you can set the credentials in your backend/.env file:
GOOGLE_CLIENT_ID=your-client-id.apps.googleusercontent.com
GOOGLE_CLIENT_SECRET=your-client-secret
The Settings page takes priority over the environment variables. If both are set, the values from Settings are used.
Step 6 - Connect a Google Account
- Go to the Google Calendar section in the desktop application (either in the sidebar or under Settings).
- Click Connect Google Account. A browser window will open asking you to sign in and grant calendar access.
- Sign in with the Google account whose calendar you want to write to. If the app is in testing mode, this must be one of the test users you added in Step 3.
- After granting access, the browser will redirect back and the application will confirm the connection.
- Select which calendar to use from the drop-down. You can use the primary calendar or create a dedicated one (e.g.
Session Masterplan).
Step 7 - Publish to Google Calendar
- Finalise your schedule in the desktop application (see Finalising the Schedule).
- Navigate to the Publishing section.
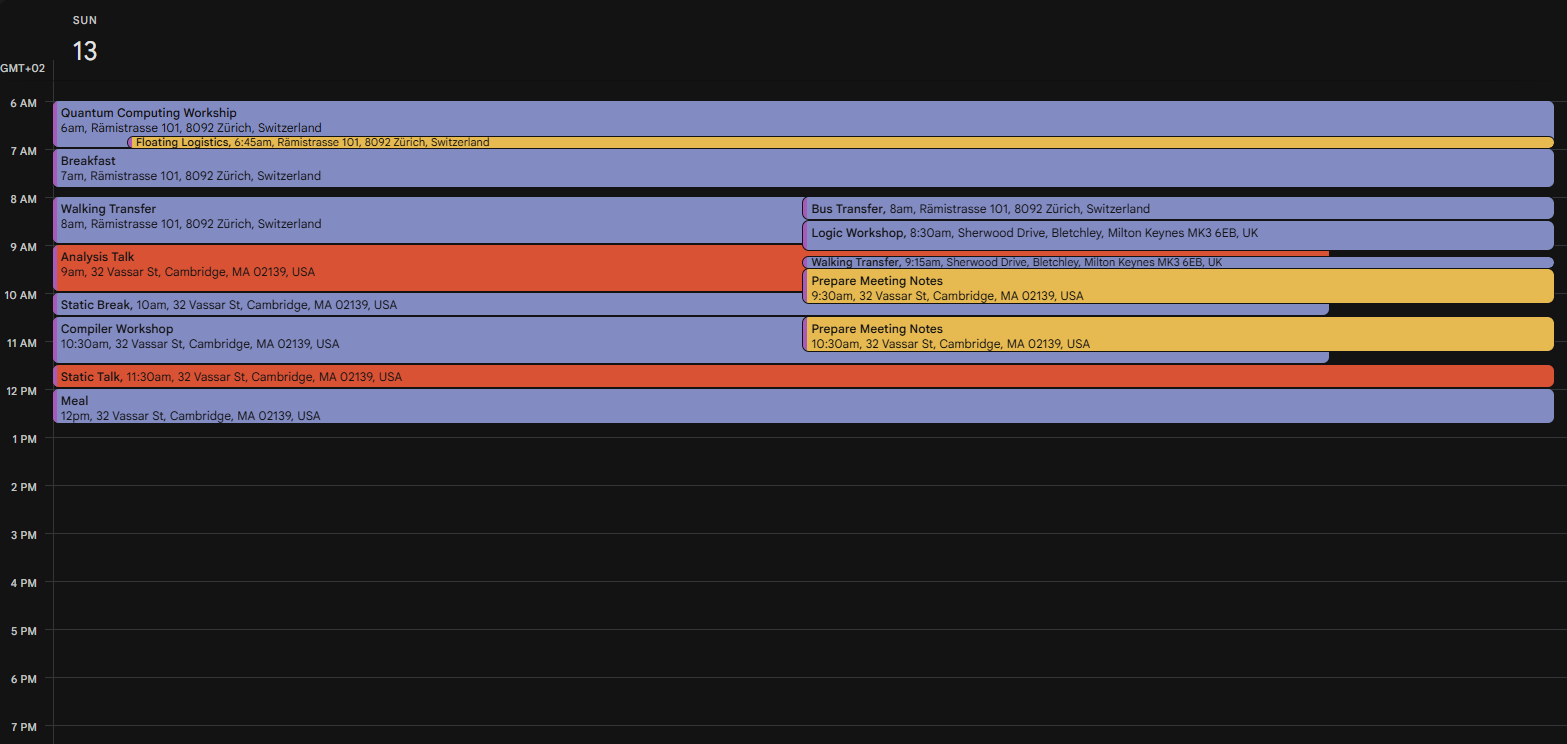
- Select the day(s) you want to publish and click Publish to Google Calendar.
- The application deletes any existing events for those days and creates new ones from the current schedule. Each event includes the task title, location, assigned attendees, and a colour code based on your export format settings.
Event Title & Description Templates
You can customise how each calendar event looks by editing the title and description templates in the export format settings. The following variables are available:
| Variable | Description |
|---|---|
{title} | Task title |
{task_type} | Task type name |
{description} | Task description |
{location} | Location name |
{location_address} | Location address |
{start_time} | Start time (HH:MM) |
{end_time} | End time (HH:MM) |
{date} | Date (YYYY-MM-DD) |
{persons} | Comma-separated list of assigned people |
Troubleshooting
“Access blocked: this app's request is invalid”
Make sure the OAuth redirect URI is set to http://localhost:8000/api/v1/google/oauth2callback. The application uses this exact callback address.
“App is not verified” warning
This is expected while the OAuth app is in testing mode. Click Advanced → Go to Masterplan Optimiser (unsafe) to continue. Only test users added in the consent screen can authorise.
Token expired or revoked
Tokens refresh automatically. If a token is revoked (e.g. from Google Account settings), disconnect and reconnect the account in the application.
Next Steps
With Google Calendar connected, see Publishing for details on how to push schedules, or MP Backend Integration to connect the desktop app to the web server.