Quick Start Guide
This end-to-end walkthrough takes you from an empty event to a fully optimised schedule. Each step links to deeper documentation if you want more detail.
Step 1 - Create an Event
On the Project Hub, click Create Event. Enter a name and the start/end dates - for example “Summer Conference” from 15 July to 20 July. Each date becomes a day in the schedule.
Step 2 - Add People
Navigate to Input → People (or click the People icon in the sidebar). Click Add Person and fill in at least the person's display name.
You can also set daily hour limits and mark specific time slots as unavailable. See People for full details.
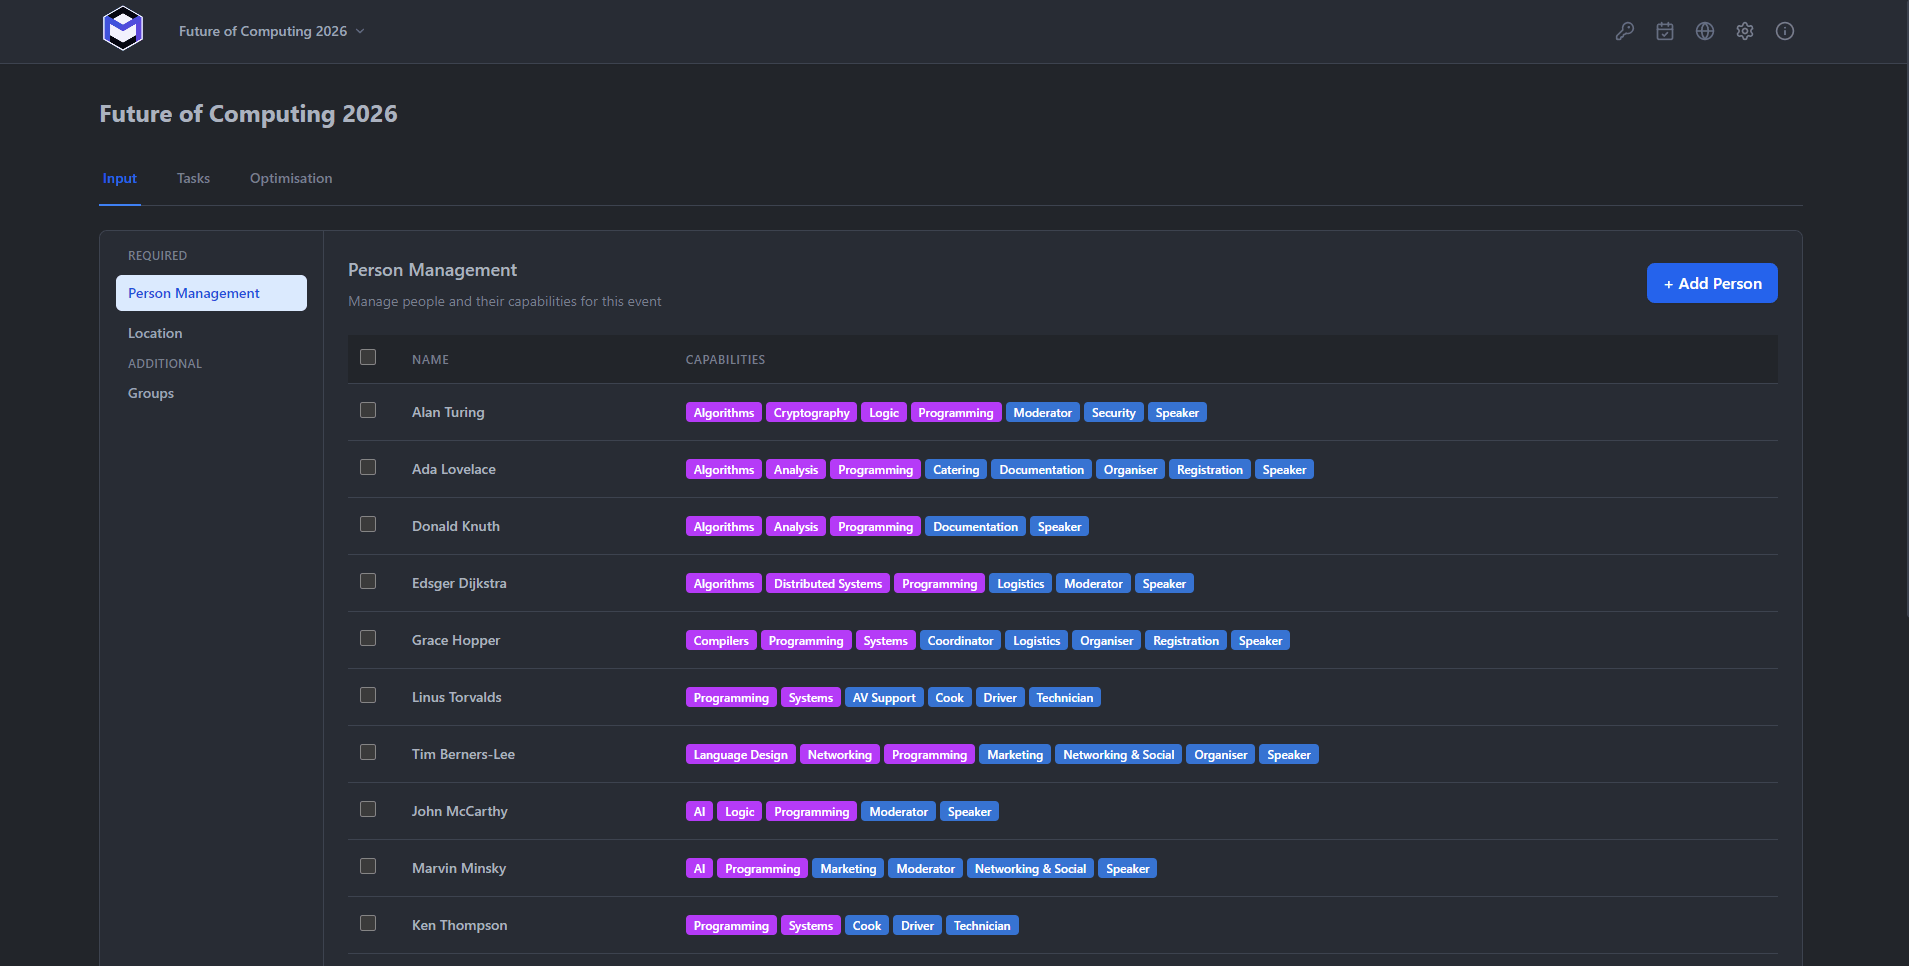
Step 3 - Define Groups and Capabilities
Groups represent organisational teams (e.g. “Sound”, “Lighting”, “Stage Management”). Go to Input → Groups and create the groups you need. Then assign each person to one or more groups. They are purely optional but simplify the assignment process, as instead of picking each member individually the whole group can be assigned to tasks.
Capabilities are specific skills (e.g. “Fly Operator”, “FOH Sound”). Create capabilities under Input → Capabilities and assign them to people who hold those skills. Tasks can later require specific capabilities.
Step 4 - Set Up Locations
Under Input → Locations, add the venues or areas where work happens (e.g. “Main Stage”, “Hall B”). Locations help the optimiser understand travel constraints and allow you to view the schedule filtered by venue.
Step 5 - Create Task Types
Task types are templates that describe a category of work. Go to Input → Task Types and add types like “Rigging”, “Rehearsal”, or “Load Out”. Each task type specifies a default colour and can require certain capabilities or group memberships. See Task Types for more.
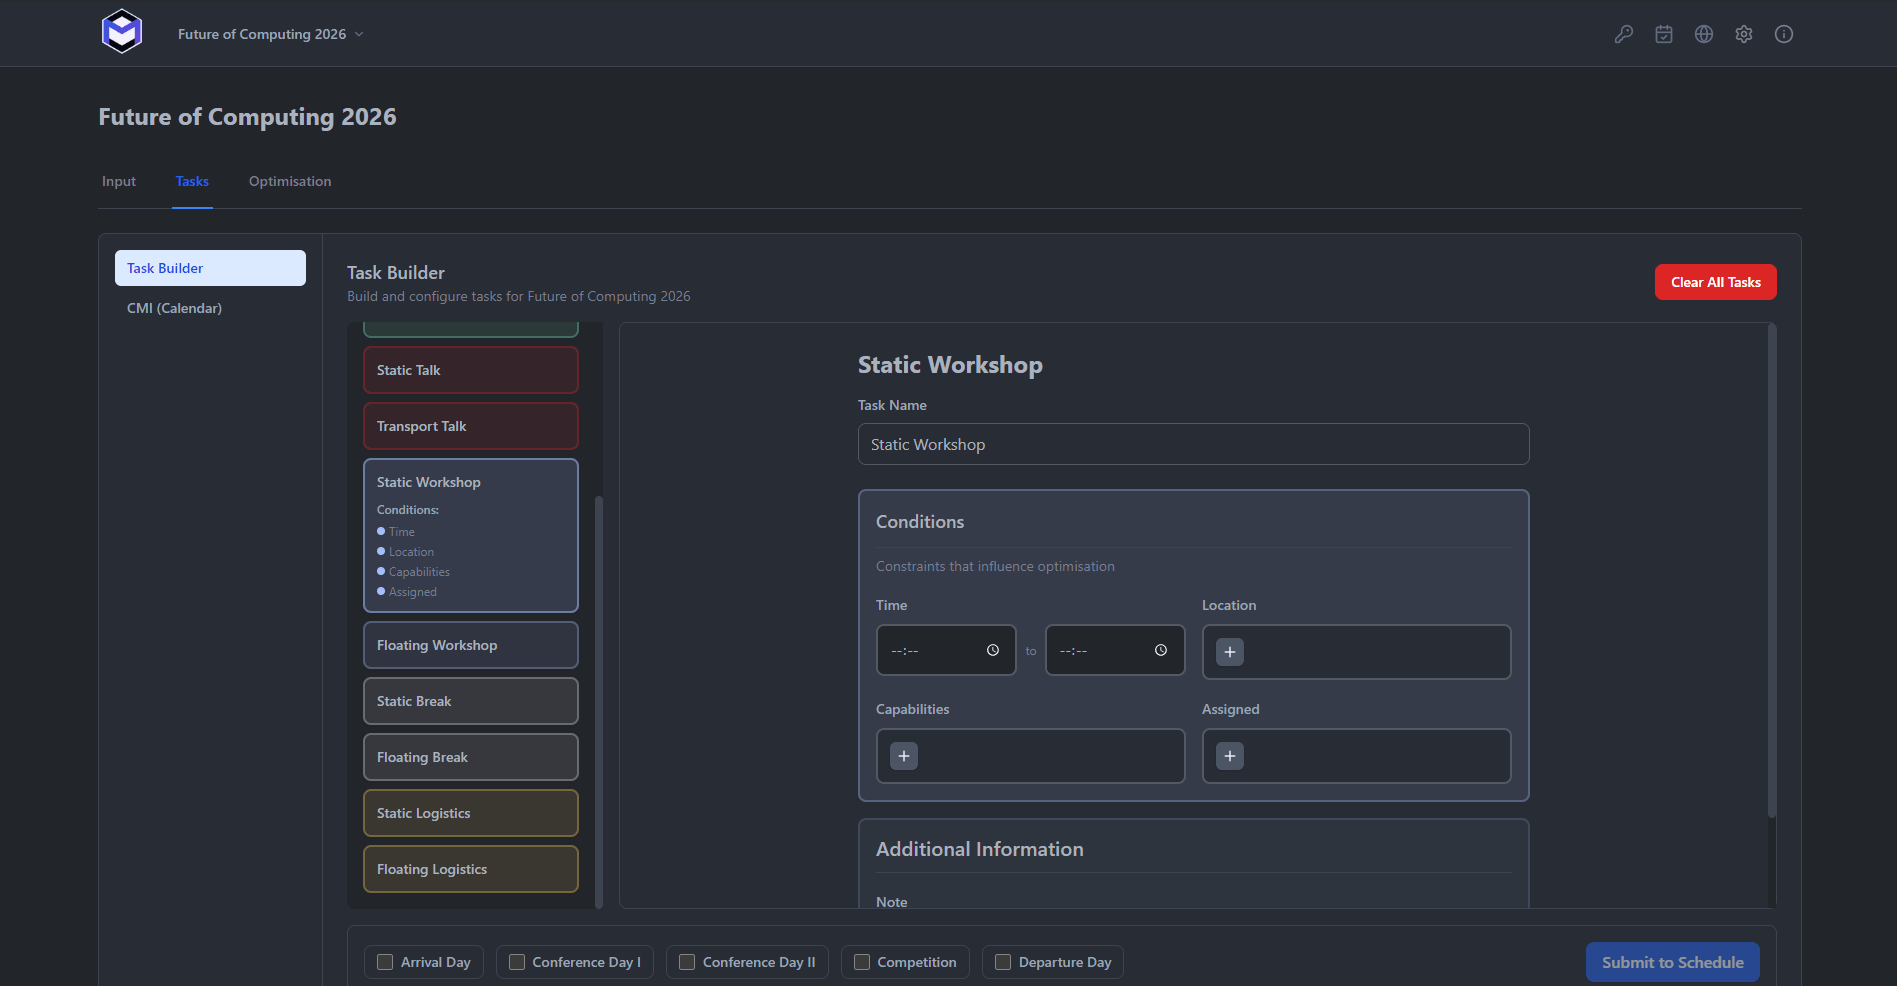
Step 6 - Build Tasks
Switch to the Tasks tab and open the Task Builder. Here you create the individual tasks that need to be scheduled. For each task you set:
- Name, task type, and location
- Day and time window (earliest start, latest end)
- Duration - how long the task takes
- Crew size - how many people are needed
- Optional: required capabilities, specific people, or the group to pull from
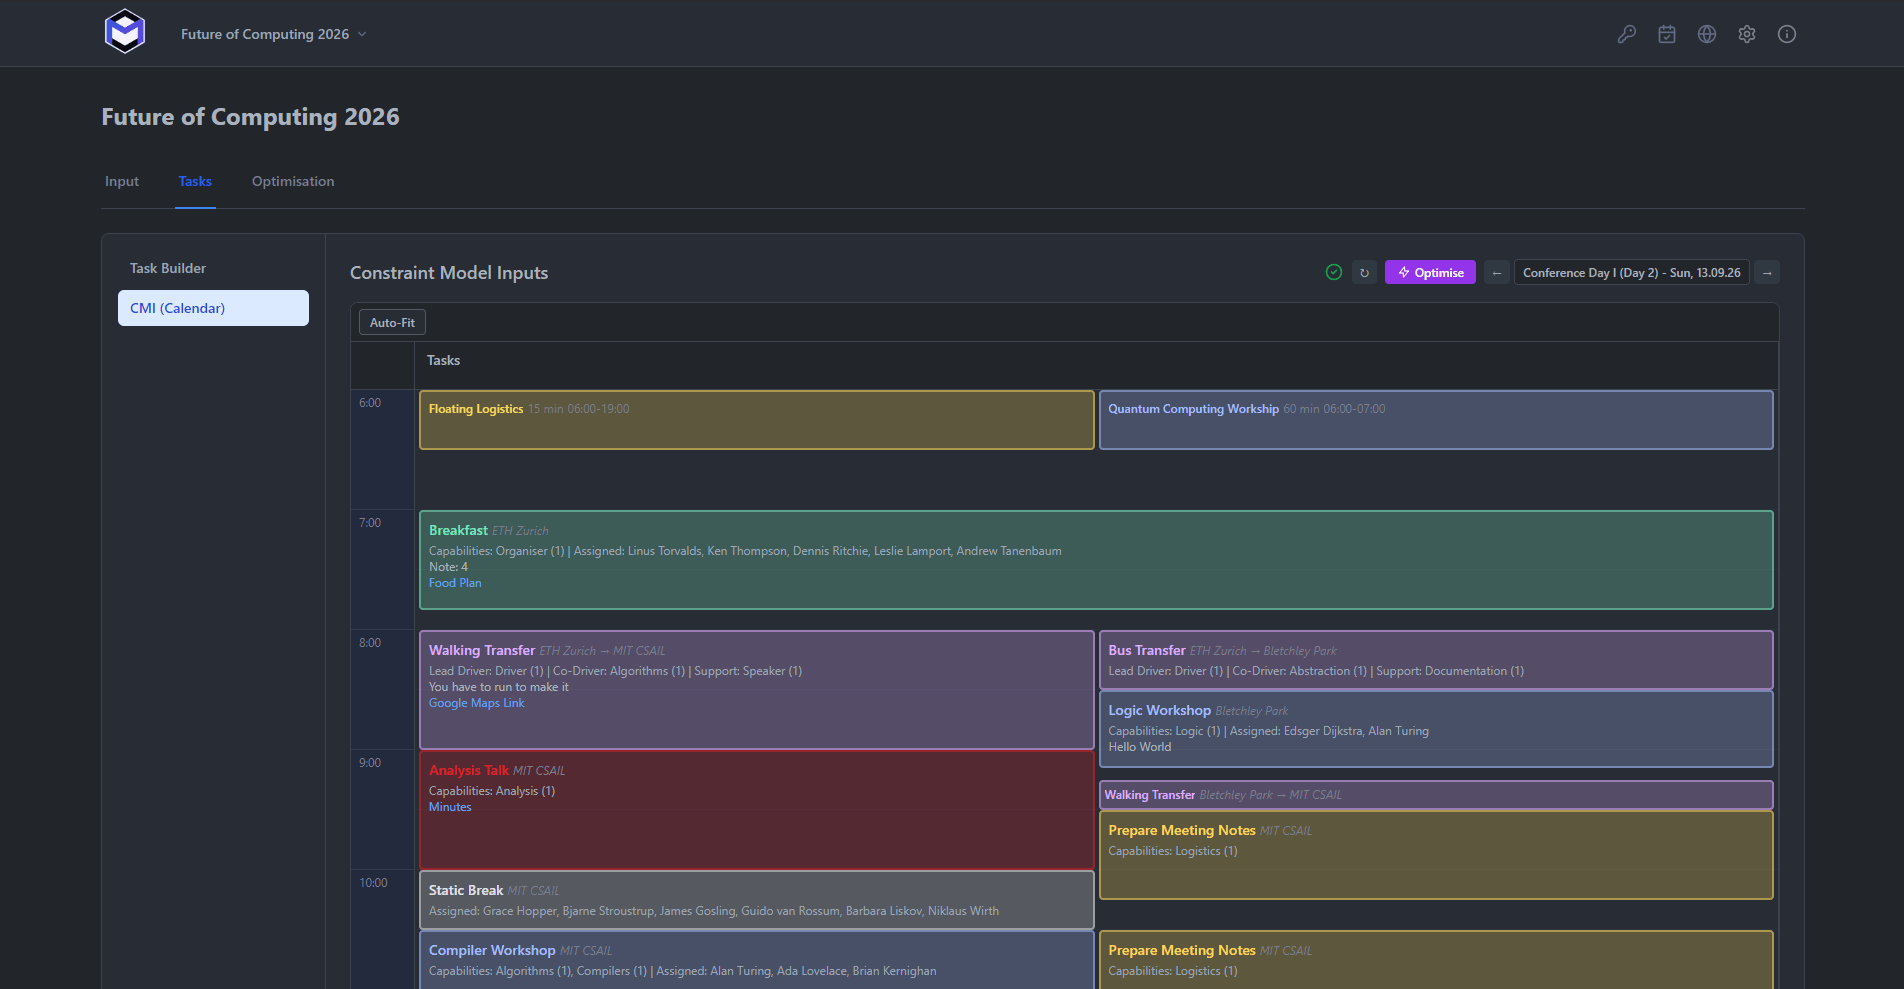
Step 7 - Review on the CMI
The Calendar Matrix Interface (CMI) shows all tasks on a visual timeline, grouped by day. Use it to spot gaps, overlaps, or issues before optimising. You can drag tasks to adjust times and double-click to edit details directly.
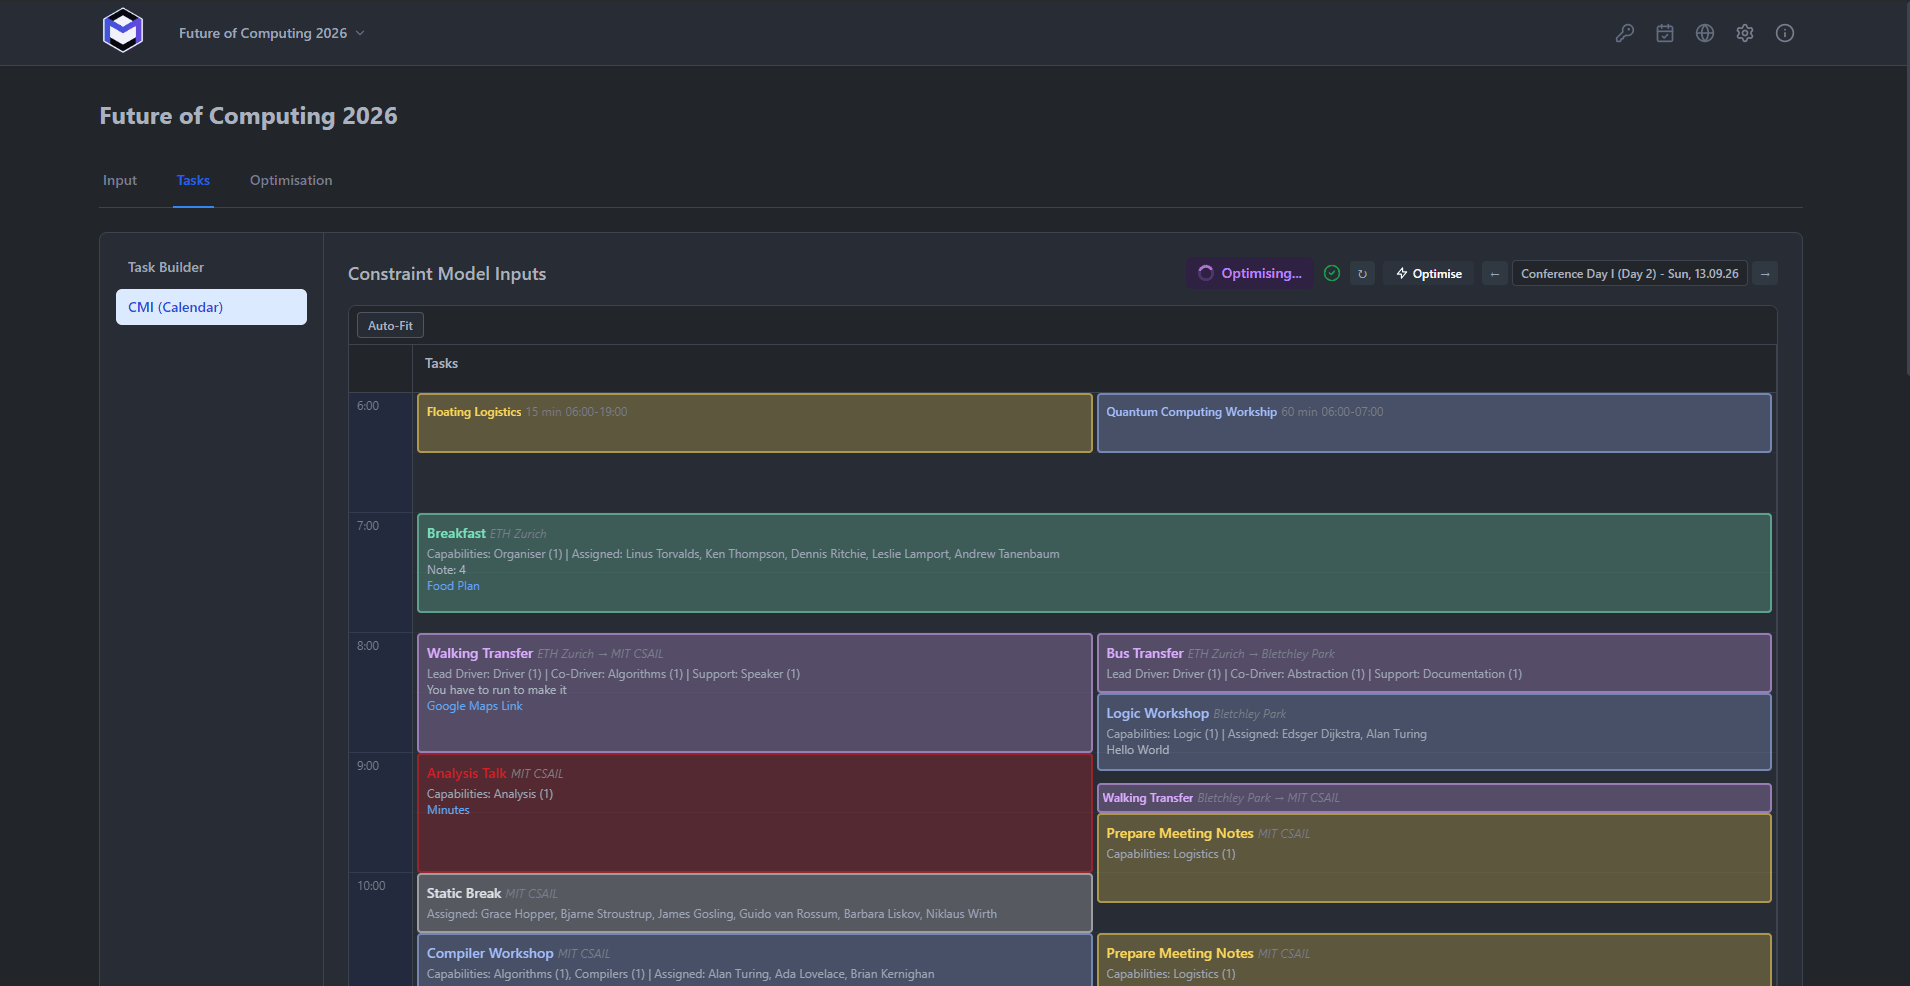
Step 8 - Run the Optimiser
Switch to the Optimisation tab and click Optimise. The solver (powered by Google OR-Tools CP-SAT) will:
- Check that all constraints are satisfiable (the “flow check”).
- Assign people to tasks while respecting availability, capabilities, group memberships, and hour limits.
- Minimise fatigue imbalance so the workload is spread as evenly as possible.
The optimisation typically completes within seconds for small-to-medium events. A progress indicator shows the solver status and objective value.
Step 9 - Review Results
After optimisation, the Results view shows the full schedule with assignments. However, this assignment is meant to be asuggestion.
Step 10 - Publish
When you are happy with the schedule, you have several options:
- Publish to Google Calendar - push the schedule to shared Google Calendars so your team can see their shifts on their phones.
- Export as JSON - create a full backup of the event data that can be imported on another machine or shared with colleagues.
- Publish to Web Calendar - if you have the web server set up, push the schedule so team members can view it in a browser at
mp-opt.net.
Summary
- Create an event with a date range
- Add people and set their availability
- Define groups and capabilities
- Add locations
- Create task types
- Build individual tasks in the Task Builder
- Review on the CMI timeline
- Run the optimiser
- Review the results
- Publish or export
For a deeper understanding of each concept, continue to the Concepts Overview.